![MOMS Email Signature-2.png]](https://knowledge.myonemedicalsource.com/hs-fs/hubfs/MOMS%20Email%20Signature-2.png?height=50&name=MOMS%20Email%20Signature-2.png)
It is now easier than ever to build your MAP: Medical Access Point/Provider™ collection network on MOMS. We have made some recent changes to streamline the process and help your lab build its network more quickly.
In order to send patients to a MAP your lab must first connect with them on the MOMS platform. You can see which MAPs you are currently connected with and which you can request in the MAPs menu of your portal.
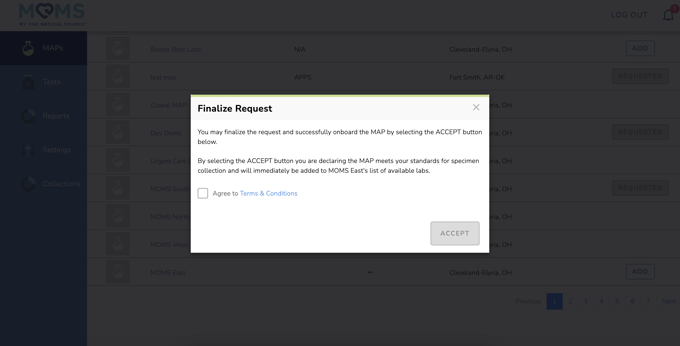
To connect with a new MAP, simply click the plus sign in the upper right-hand corner of the MAPs menu. Once you find a MAP with which you would like to connect, click "ADD." A notification message asking you to "Finalize Request" will appear. You are required to agree to the Terms & Conditions and click "ACCEPT." By selecting the ACCEPT button you are declaring the MAP meets your standards for specimen collection and will immediately be added to both your, and the MAP's, network.
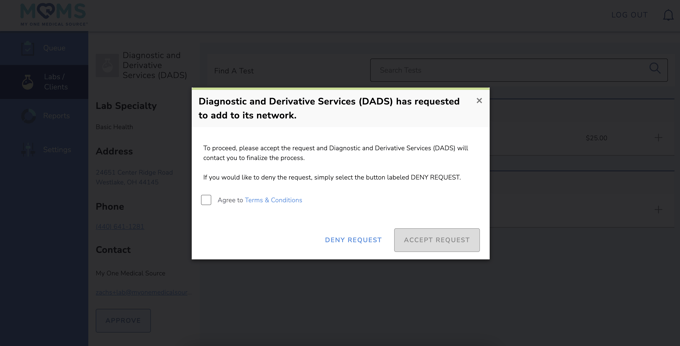
When your lab sends a connection request to a MAP, they will receive an email notifying them of the request (screenshot below), as well as a notification on the platform.

Once the MAP views the request, they will be directed to the MOMS portal to Accept or Deny it.
Once the request has been accepted by the MAP, you will receive an email notifying you that the connection is complete.
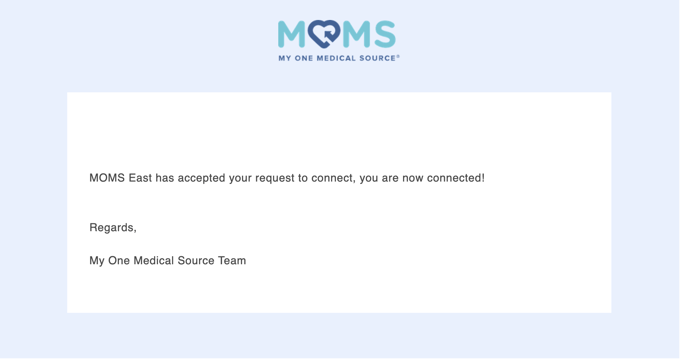
When connections have been finalized, patients can now schedule collections for your panels at these locations.
If you or your team need a platform refresher demo, you can schedule one here.